Saturday, October 29, 2016

Practically Purrfect


I hate coloring cats. There, I've said it and feel 100 lbs lighter.  I want all cats to look like my Frankie which is just impossible.  I mean how do you color a cat at that scale with cloud rosettes--far beyond my skill and patience--so I skipped all that and made this one "calico" with designer paper.  Seriously love!

Happy World Cat Day!  Have you entered the Cat Lovers Hop?  Today is the last day!


The Details:  Avery Elle Dear Santa, Neat and Tangled Kitty's Favorite Things, We R Memory Keepers Geometric Embossing Folder, My Mind's Eye On Trend 2 6x6 designer paper, Copics, Pretty Pink Posh sequins, Simon Says Stitched Rectangle die


Friday, October 28, 2016

Window Bloom


Another card for the Hop to Stop domestic violence.  I didn't have time to color all of the blooms so I chose to highlight one and thought creating a window to make the card interactive would be a fun touch for the recipient.  And because the window is on the top layer and the sentiment stamped on the outside of the card base, you can write all you want on the inside.  Love!

To create the window, I placed the die on the card front, then hung the part I didn't want cut over the edge of the cutting plate.  Easy peasy.


The Details:  Zigs, Flourishes Gerbera Daisies, Papertrey Ink Choose Joy, Waltzing Mouse Stitched Scalloped Rectangle die

Thursday, October 27, 2016

A New Day

Wow, time totally slipped away from me so I'm squeaking in with a few cards for Becca's Hop to Stop domestic violence and hope you have time to join in and show your support. You have until October 30 and can even mail the cards to Becca for distribution at her local shelter. I'm going all out and totally destashing. Who doesn't make more cards than they actually mail, am I right? Be prepared for some happy mail, B.

In all of my cards, I've chosen inspirational messages and scenes that I hope will lift spirits and remind people they are strong and capable and able to overcome anything.  I myself have been the victim of abuse and know how difficult and lonely that place can be.


The DetailsStamplorations New Beginning - Dee's Artsy Impressions, Memento Tuxedo Black, Waltzing Mouse Stitched Scalloped Rectangle die, Distress Inks Picked Raspberry, Worn Lipstick, Seedless Preserves, Wilted Violet


The Details: Stamplorations New Beginning - Dee's Artsy Impressions, Memento Tuxedo Black, Copics, Simon Says Stitched Rectangle Die


The Details:  Versafine Onyx Black, Doodlebug black/white striped washi, Ranger watercolor paper, Distress Inks, Peerless Transparent Gold, Stampscapes Lakeside Cove Large, Eyelet Outlet Enamel Dots, MFT Pierced Circle die


Wednesday, October 26, 2016

The Great Copper Tape Experiment


You know I've been working with Chibi lights recently.  Well, I had opted to buy components instead of the kit for added cost savings--compenents being a set of 30 lights, 20 batteries, and a roll of copper tape, all from Amazon.  This means I have a 55-yard roll of 1/4" copper tape.  55 YARDS.  This is a lotta lot.  I was thinking I could add stripes to cards like I would with washi then I recalled how lovely copper gets when you burn it.  Yes, burn it.
  1. The Left:  Plain tape adhered to 80lb cardstock.  Note I cut myself royally while doing this--imagine the deepest paper cut ever.  A rubber glove should be sufficient to avoid this in the future.
  2. The Middle:  The tape has been burned with one of those long lighters that you might use to light up charcoal or a fireplace.  A mini butane torch would have worked fine but I didn't feel like digging out the one I use for jewelry-making.  Notice how the tape has bubbled up from the paper.  Not to worry.  But do worry about not leaving the flame in one place too long to avoid setting the paper aflame.
  3. The Right:  The copper panel die cut with leaves.  Notice how I buffed away the soot before using the dies and how the tape flattened right back out.


That done, I stamped the Neat & Tangled sentiment then stenciled the tree onto the panel.  I decided to add a copper frame--I adhered a couple of strips of tape around the perimeter of a panel then die cut it.  Next time I will consider mitering the corners or some other artful way to make the corners consistents.  I adhered the frame down then placed the leaves every which way.  The warmth of the copper and the burnt pieces are stunning in real life. 

I'm entering this in AAA Cards #76 Masculine, Watercooler Wednesday WWC91 Masculine, Simon Says Wednesday Anything Goes


The Details:  Neat and Tangled Be Full, Versafine Onyx Black, Gina Marie Scalloped Stitched Frame dieDistress Ink Antique Linen, Lawn Fawn Stitched Leaves dies, Hero Arts Elegant Pine Stencil, copper foil tape


Tuesday, October 25, 2016

Grateful Fox


I'm over at The Heart Desires blog today with a card featuring all sorts of fall goodness.  I particularly love the heart falling leaves and the grid paper I upcycled from Hero Arts packaging.  So flippity flappity cute!

I sprinkled Brushos on watercolor paper and spritzed.  One area got too muddy for my taste so I used the Neat and Tangled coverplate to hide it.  Shh, no one needs to know.  ;-)   I do love the impression of fall leaves the triangles create.  The SPD heart border diecut as well as the fox are colored with Copics.  I just want to hug that fox--look at him!

I'm entering this in SIP #71 Colors.


The Details:  Sugarpea Designs Fall Fox, Stitched Flags die and Heart Border die, Neat and Tangled Hexastar Cover Plate, Brusho Emerald Green, Dark Brown and Orange, VersaFine Onyx Black, Ranger Multi Medium Matte and Watercolor Paper, Memory Box card base, Upcycled Hero Arts packaging (grid paper), Copics, Sakura Black Glaze pen


Monday, October 24, 2016

Are You for Real?


I love puns and I love cute so how could I resist pairing up these adorable Simon Says Critters with the MFT sentiment and a little bit of this and that?

We have the princess kitty for my youngest niece.  She's so girly girl which I know was a welcome change for her mom after having two rambunctious boys.  And speaking of the boys, one gets a bunny pirate and the other gets a something tiger.  What is that?  Mouse? Bear? Pup?  In any case, they're very different cards, yet uses the same layout--OMG, did I just use a sketch?  I hope my friends are sitting down when they read this!

Happy Halloween, my lovelies!  I am so very glad you're for real!

I'm entering the cards in Addicted to Stamps and More #216 Anything Goes and Shopping Our Stash #274 Hey Ghoulfriend.  I'm entering the princess card in Simon Says Wednesday Think Pink.

The Details:

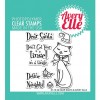
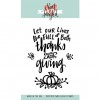
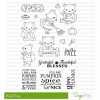
All:  Simon Says Critter Costume Party, MFT Magical Unicorns, Copics, Memento Tuxedo Black

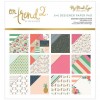
Princess:  Doodlebug Lily White glitter, ScorTape, glittered foam, Gina Marie Scalloped Stitched Frame, Hero Arts Star Confetti die, Distress Ink Mermaid Lagoon

Tiger:  Hero Arts Petals stencil, Clarity Large Leaves stencil, Waltzing Stitched Scalloped Rectangle die, Yvonne's Creations Palm die, MFT Jungle Friends dies, Distress Ink Mustard Seed, Carved Pumpkin, Twisted Citron and Mowed Lawn

Pirate:  Gina Marie Big & Little Pierced Chain Rectangle die, Memory Box Marina Sailboats and Big Splash Border dies, SU/Sizzix Waves embossing folder

Sunday, October 23, 2016

Getting Juggly with It


My juggling girl concept totally worked!  I didn't do a step by step on this--moving too fast (me, not her!) but the gist:


  1. Decorate main panel as desired.
  2. Using small circle die, cut notch at top of main panel, and both front and back of card base (this is really so the recipient realizes they can move the weird edge sticking out of the card).  You can see this on the final card, but not on the mock up.
  3. Cut MFT circular channel; her body hides the connector tab.
  4. Cut circle; this one is 4 inches.
  5. Center the large circle behind the smaller channel one, pierce them in the middle and connect with a brad.  In this case, the brad becomes the pom pom on her hat.
  6. Add objects around upper half of channel using foam tape.
  7. Add a couple of layers of snow.
  8. Mount the girl on the card with foam tape, being careful not to block the channel.
I was inspired by the colors and stacked (snow) objects with my card.  Just such a fun palette of colors to work with!  You have until this Wednesday to join in the fun with us at The Heart Desires Challenge #5. Hope to see you there!


I'm entering this in Addicted to Stamps and More #216 Anything Goes, Holly Jolly #83 Snow or Snowmen, Simon Says Wednesday Think Pink

The Details:  Avery Elle Dotted Borders dieRanger Round Ink ApplicatorMulti Medium Matte, Distress Inks (Evergreen Bough, Scattered Straw, Tumbled Glass, Spun Sugar), MFT Pure Innocence Jump for Joy, Beast Friends (presents), and Pierced Circle and Circle Spinner Channel die, Hot Off the Press stencil, Recollections white brad, Copics, Sakura white pigment pen


Friday, October 21, 2016

Merry Xmas from Seattle

Tomorrow I'm getting together with some crafty friends and designed this make and take for the gals so they can try out a slider.  So simple and so cute!

I did a Distress Ink watercolor wash on the background, stamped the skyline THEN spattered with Copic Opaque White.  You just water it down a tiny bit then spatter away.  It's not called opaque for nothing--love!  I then stamped the sentiment.  Next I diecut the slot--notice I adhered the diecut onto the card base for a seamless background--and the glittery Space Needle and its shadow.  I assembled the slider do-bob (an MFT slider element and 2 cardstock circles) and set that aside for the glue to dry while I colored up that cute reindeer.

My last step, of course, was to attach the reindeer to the slide mechanism and give him a Glossy Accents nose.  So cute!


The video may also be viewed on YouTube.

I'm entering this in Jingle Bells While Shepherds Watched Their Flocks (animals)Simon Says Wednesday Think Pink, Addicted to Stamps and More Anything Goes, and Holly Jolly Christmas Snow or Snowman

The Details:  Lawn Fawn Slide on OverVersafine Onyx BlackRanger Watercolor Paper, Ranger Multi Medium Matte, Distress Inks (Squeezed Lemonade, Worn Lipstick, Picked Raspberry, Wilted Violet, Blueprint Sketch), Mama Elephant Reindeer Games, Impress Seatle Holiday, Savvy small Space Needle die,  Copics E31, E33, E35, E37, E39 (hooves), E95 (blush on cheeks), R29, Y38, MFT slider elements


Thursday, October 20, 2016

Stamplorations CAS October Mid-Challenge Reminder!


Wow, this month is slipping by quickly!  If you haven't already or even if you have, come on over and join in the fun at Stamplorations CAS.  This month the optional color is black.  Can't get much easier than that!

For my card, I had my brother and his wife in mind.  They own a travel agency and are always jet-setting around the world.  For instance, in August they went to Vietnam, Burma and other nearby areas.  Crazy, huh?  I think this card captures their love of travel perfectly.

Really simple:  I stamped and masked the plane then used a Clarity brush to add sky with Distress Inks.  I played around with sentiment placement then stamped them as a group, without a MISTI, thank you very much.  I love how well Stamplorations stamps hold ink.  Next I cut out the panel with the crazy stitching die and then embossed.  Love!


The Details:  Stamplorations Born to Roam and Crazy Double Running stitch die, Distress Inks Tumbled Glass and Mermaid Lagoon, Memento Tuxedo Black, Carta Bella embossing folder