Thursday, October 13, 2016

All Good Things


I've been wanting to try the Ranger Distress Speciality Stamping paper for a while now.  The smoothness reminds me very much of Yupo.  I decided to use the Versamark ghosting technique shown over at the current CAS Mix Up (they're having a DT call!) to really test its uses and limits.

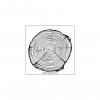
I stamped the tree ring in Versamark then sprinkled some Brushos and spritzed with water. Hold my breath time--could this paper handle spritzing?   Yes?   Would it warp?  Barely!  Dried in a hot minute too! I absolutely adore the results. Now the resist of the tree ring wasn't as defined as I had hoped with the Brushos, but, wow, it really showed up when I stamped the main image.   And without having to heat emboss--brilliant!


As you can see I was also very much inspired by SIP #69 Fall in Love and Waffle Flower Photo Inspiration October 2016 (fall colors, nature, wheat).


The Details:  Concord & 9th Tree Ring, Dark Brown, Sunburst Lemon and Orange Brushos, Hero Arts Sand to Chocolate Brown Ombre ink, Ranger Distress Speciality Stamping Paper, Gina Marie Big and Little Pierced Chain Rectangle die, Waffle Flower Wild & Free, Versamark, Stampendous Detail Fine White Embossing Powder, Bazzill Fig Swirl cardstock, We R Memory Keepers Woodgrain Embossing Folder, Candied Apple Distress Ink


Wednesday, October 12, 2016

All About the Treats


I am loving the latest THD Challenge #5 inspiration pic so very much.  It's wonderful when there's not enough time in the day to put all of the creative ideas in action, as opposed to those crafter's block moments. 


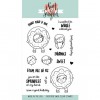
For this card I did lots of masking to create the scene then cut it out with my Scan n Cut 2.  Without the bezillion layers, it easily fits in an envelope for mailing!  I colored the image up then stamped worked up the sentiment.  A few layers, reminding me of the donut frosting frame the lot.


I hope you are inspired to join in THD Challenge #5.  Come on over and play!

I'm entering this in Cards in Envy Frame It 

Side note: I saw that Michaels is now carrying the Scan n Cut 2.  I highly recommend it and hope Santa is nice to all paper crafters this year.

The Ingredients:  Neat & Tangled Say Yes to Donuts, Ranger Multi Medium Matte, Waltzing Mouse stitched scalloped rectangle die, Mama Elephant Framed Tags Park Avenue die, Copics, Stampendous detail fine white embossing powder, Versafine, Ellen Hutson Treat Yo'self die


Tuesday, October 11, 2016

So I've Got All These Stamps


My merwitch card the other day had me thinking about my stamps in a new way.  How can I stretch them to get more usage?  I'm very fortunate to get to play with a lot of different sets and I find it ever so easy to use the set once or twice then move on to my next obsession.  So wasteful really.

It was lovely this round to use a new set (thanks for letting me borrow the HA Coffee Cups Tags set, Kimberly!) and pair it with the older HA Stamp Your Own Succulents set.  Sa-woon!

I traced out where the "coffee pot" would go then stamped and masked the succulents before stamping the pot.  I colored the succulents using all sorts of Copic green (particularly love the BG93-99 gray green combo).  I added red Stickles berries to the burro tails in keeping with the fab Jen Hadfield background paper.  So very pleased with how this turned out.

I'm entering this in Hero Arts Holiday Cardmaking Challenge, Little Tangles #73 Coloring, Inkspirational #119 Use 5 or More Stamps


The Details:  Pebbles Jen Hadfield Warm & Cozy 6x6 paper, Hero Arts Ombre Light Ruby to Red Royal, Coffee Cups Tags, and Stamp Your Own Succulents, Memento Tuxedo Black, Waltzing Mouse stitched scalloped rectangle dies, Copics, Ranger Red Stickles


Friday, October 7, 2016

Swimming by with Halloween--Wait, What?


Halloween stamps are the ones I have the absolute least of--it's such a specific holiday. BUT, I also have multiple nieces and nephews of trick or treating age so there's no way I could get away with not sending them Halloween cards.  What kind of aunt would I be?  I'd be that aunt and no one wants to be her.  So I thought about the sets I have and how they could Halloweened up.  This is the result!

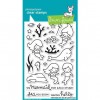
I started by coloring the background using Distress Inks.  I used a lot of ink to get this level of saturation so the paper needed to dry overnight before I cut it using the coverplate.  Next I colored up the mermaid who would normally be seated on a rock but instead I perched her on the trident that comes with the LF set.  I extended the length using a Copic multiliner.  I found her hat as clipart online.  I printed the hat, masked it, then stamped her beneath.  I then had my Scan n Cut 2 cut out the lot.  I colored her up and added Wink of Stella for shine.


Next came the haunted aquarium house.  Notice the "tree"?  I replaced the regular tree with coral! Oh, I'm having fun now!  I also added a Chibi light to make the house light up.  To do that, I added a piece of vellum to the back of the house and colored it a dark yellow orange.  This tones down the brilliant white of the light and makes it a bit spookier imo.  I also cut out openings in the card front beneath the house windows so the light would shine as much as possible. I've added pics of the mechanism below.
  1. On my card base I penciled in where the house and mermaid were so I would know where to place the light and battery.
  2. I created a box of sorts for the battery using scrap paper I had scored.
  3. I laid down the copper tape.  I used to cut the copper tape in half to save it then realized I have a 55 yards of the stuff so I won't be running out any time soon.  LOL.
  4. What you can't see because the Chibi light is covering it, is the gap between the positive and negative copper lines.  They must not touch.
  5. Note that I have only used one Chibi light centered between the lights.  This proved sufficient to light the windows during testing.
  1. You can see the light at work.  The first pic in this post is also animated so you can see the light in action.
  2. Note the positive side of the copper tape wraps up and over the battery box.  This way the light will only activate when the box is pushed down and the positive tape makes contact with the battery. 
  1. I cut openings for the battery box and Chibi light through two layers of sticky back fun foam.
  2. I also cut a channel through one layer of the foam to accommodate the tab that prevents the light from being activated in transit and wasting the battery.
  3. I attached the foam to the card base only along the edges.  I thought the adhesive of the foam might interfere with the conduction of the copper tape if I used all of the fun foam sticky backing.  Just an untested idea.
  4. The next step is adding the tab and card front then lots of testing of the light because it's fun!

I'm entering this in Fab 'n' Funky #321 Include the Word Happy, Naughty or Nice #32 Spooky Sistahs and Wild, Wild Women, Stamp Ink Paper #68 Card Maker's Choice

The Details:  Lawn Fawn Mermaid for You and Booyah, Ranger Round Ink Applicator and Multi Medium Matte, VersaFine Onyx Black, Wink of Stella, Impression Obsession Halloween Hill die, Taylored Expressions Build a Scene - Underwater dies, Simon Says Stitched Whirl Background die, Distress Inks, Memento Tuxedo Black, Stampendous Detail Fine White embossing powder, VersaFine


Thursday, October 6, 2016

Stamplorations CAS October Challenge!


This month's Stamplorations CAS challenge is sooooo easy to add the optional color twist of black.  I'm hard put to think of cards I've done that don't have black of some sort or another on them, right? 

For my card, I masked the card front and sponged with autumnal shades then spattered with a bit of water.    The Happy Flowers stencil really pops in black against the colored strip, doesn't it?  It's such a versatile stencil.  Love!


The Details:  Stamplorations Lotus Love, Artplorations Happy Flowers, Distress Inks Wilted Violet, Black Soot, Mustard Seed, Picked Raspberry and Candied Apple, Memento Tuxedo Black

Wednesday, October 5, 2016

The Heart Desires Challenge #5


We've got a new challenge starting up for October over at The Heart Desires!  I love everything about this one--the colors, the punny sentiments, the stacked pumpkins.  The elements to use this round are the colors, stack 'em up and large sentiments.

 
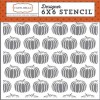
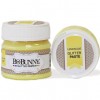
I used all three elements in my card--is this a first?!  I applied Bo Bunny glitter paste--I mixed my own orange and green--to the masked pumpkin stencil.  I set that aside to dry which takes no time at all.  Look at that shine!


I stamped the sentiment on acetate using Stazon, using a Copic multiliner afterwards to fill in the black completely (my Stazon needs reinking).  I die cut the various panels then assembled the shaker.  Tip of the day:  when adhering something to the glitter paste, lay a heavy object on top to create a good seal and wait until dry.  The glitter paste is textured so gluing something to it needs a bit of love.

Now go treat yo'self (and us!) and join in at THD Challenge #5!

The Details:  Carta Bella Pumpkin Stencil, Bo Bunny Lemonade, Tutu, & Blueberry Glitter Paste, Waffle Flower Flower Circles Inverted die, SugarPea Designs Fall Fox, Stazon Jet Black, Simon Says Stitched Rectangle die, Waltzing Mouse Stitched Scalloped Rectangle die, Glossy Accents, Recollections mini sequins


Monday, October 3, 2016

Awesome

Well, now, I have a few NBUS in this card.  Are you familiar with that term coined by Darnell?  It refers to "Never Been Used Stuff."  I've got a lot of it here.  The MFT coverplate.  The Waffle Flower In Every Way stamp set.  Almost the Avery Elle rounded corner rectangle die that I thought I would get more use out of but not (so far).  Using stuff = less guilt about mega unused stash = time to buy new stash.  All Darnell's fault!  LOL.

Check out the colors and circular shapes in the current Card Concept challenge.  Fab inspiration image, huh?  My card is clean and layered.  A bit graphic too, I suppose.

I'm entering this in TIME OUT #67, Simon Says Wednesday Anything Goes, The Card Concept #58 Sweet and Sour


The Details:  Waffle Flower In Every Way, Hero Arts Neon Red to Purple Ombre and Neon Yellow to Orange Ombre, Versafine Onyx Black, Eyelet Outlet black enamel dot, Doodlebug glitter enamel dots, MFT Peekaboo Polka Dots, PTI Kraft cardstock, Avery Elle Rounded Corner Rectangle die


Sunday, October 2, 2016

Happy Little Stampers CAS October Challenge!


I was so excited to learn that this month's HLS CAS challenge is embossing on vellum.  I had just gotten a new Heidi Swapp stencil and Minc Reactive paint so this was the perfect opportunity to try it out!

I have to say I am amazed at how easy it was use the stencil with the paint.  Amazing results.  The stencil is tacky on the back so there's little chance of the paint seeping where it shouldn't (ask me how I know).  It also rinsed right off the stencil no problem and dried quickly on the vellum.  I ran it through my laminator with gold Deco Foil and magic happened!  Love!  I mounted the vellum on a striped panel I had created using the Concord & 9th Stripe Builder set and HA ink.  I had to ink it up numerous times using the MISTI to get good coverage.  Had I used Versamark then the HA ink on top, I bet it would have been much easier.

I did try embossing the sentiment but Versamark had no adhesion on top of the foil so I stamped and fussy cut instead.  I like the effect of the raised sentiment panel so all good.

I hope you'll join us at HLS CAS; I look forward to seeing what you come up with!


The Details:  Concord & 9th Stripe Builder and You're My Person, Waffle Flower Lacy Layers die, VersaFine Onyx Black, Hero Arts Soft Pool, Heidi Swapp stencil, Minc Reactive Paint, Deco Foil Gold, Bazzill Icy Mint, PTI vellum, Scrapbook Adhesives vellum tape

Happy Birthday, Lenae!


Today is the birthday of my crafty gal pal, Lenae!  Happy birthday, girl!  Lenae works up amazing interactive cards, one of which you will see on my blog, eventually (I still have to color it up the make 'n' take), so I knew I wanted to make an interactive card for her.  This one took quite some thinking and doing and a bit of cursing, but so worth it.  LOL.  I hope you like it, Lenae, and I hope you have a fabulous day!

Btw, this is a birthday hop (omg, just realized I used bunnies in my card--hop . . . get it? LOL) and you should have arrived here from Lisa and are on your way over to Tonya.  Lots of fun inspiration for you!

Oh!  One last thing.  Notice the pretty pastel colors of my card and the dominant sentiment?  Perhaps I was inspired by a certain upcoming challenge (cough, cough, The Heart Desires).


I'm entering this in Seize the Birthday Anything Goes


The Details:  Lawn Fawn Slide on Over dies, My Favorite Things Strike Up the Band, Distress Inks Spun Sugar, Picked Raspberry and Squeezed Lemonade, Memento Tuxedo Black, Doodlebug and Eyelet Outlet enamel dots, Copics,

Saturday, October 1, 2016

House of Cards October Challenge!


This month at the House of Cards you're asked to create a gatefold card or use the colors from the inspiration photo.  I have to confess that I started out with an attempt at a gatefold card but my measurements were off, a lot, so I decided to stick with what I know and go with the lovely colors of the doors.

I used my Clarity brush to add layers of Distress Ink to cardstock.  I purposely made one side darker so I could have two different colored feathers when I cut them out.  But before doing that I spritzed the card with Minc Reactive Spray and embossed it with gold and teal Deco foil.  Ah, there we go.  I stamped the fab Stamplorations sentiment then used the PTI linen impression plate to give the card panel a distressed feel like the doors.


The Details:  Tattered Lace Feather die, Stamplorations Lotus Love sentiment, Distress Ink Mermaid Lagoon, Peacock Feathers and Evergreen Bough, Deco Foil Gold and Teal, Simon Says Stitched Rectangle die, Heidi Swapp Minc Reactive Spray, PTI Linen texture plate and kraft cardstock, Recollections 110lb white cardstock, Memory Box cardstock base